

How to Hang a Garden Gate That Opens Properly
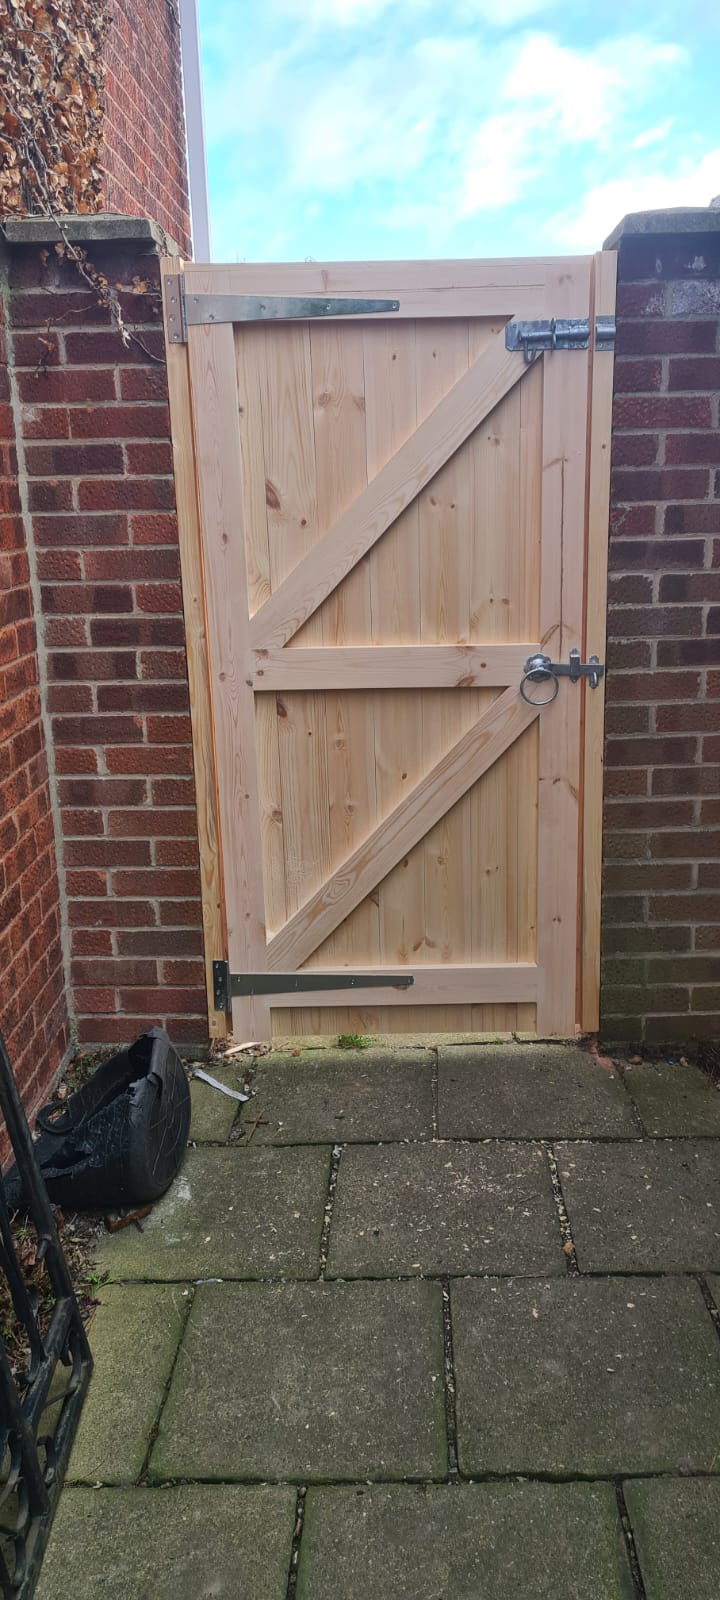
A well-made timber gate can last for many years, but only if it is hung on posts that are solid, square and suited to its weight. Knowing how to hang a garden gate properly prevents the familiar problems of dragging corners, sticking latches and a gate that refuses to close after a wet winter.
The gate itself is only one part of the job. The posts, hinges, fixings and clearances all work together. Take time to set these out before drilling a single hole and your gate will open freely, sit neatly in the opening and give the strong, traditional finish a garden entrance deserves.
Start with sound gate posts
Do not hang a new gate from an old, loose or undersized post. Even a relatively modest garden gate puts leverage on the hinge post every time it opens. If that post moves in the ground, the gate will drop and the latch will soon stop lining up.
For a typical pedestrian garden gate, use substantial timber gate posts appropriate to the width and weight of the gate. The posts must be installed plumb in both directions, with their faces in line with one another. Check this with a spirit level and a straight edge before the concrete has set. A post that looks close enough at this stage can create an awkward gap later.
Allow the concrete to cure fully before fitting the gate. This is particularly worthwhile after wet weather, when freshly set ground can be softer than it appears. If you are fixing to brickwork or a wall, use a correctly sized timber wall plate and suitable masonry fixings rather than trying to mount strap hinges straight onto uneven brick faces.
Measure the opening in three places: at the top, centre and bottom. Garden openings are not always perfectly parallel. Work from the narrowest measurement, then allow for the hinge-side clearance, latch-side clearance and the gaps needed for the gate to move without rubbing.
Choose hinges to match the gate
A traditional timber garden gate is usually hung on hook and band hinges. The long bands spread the load across the gate rail, while the hooks carry that load on the post. They are strong, straightforward to adjust and suit both ledged-and-braced and framed garden gates.
Choose hinges that are long enough to support the gate properly. As a general rule, the hinge band should reach at least a third of the way across the gate. A wider or heavier gate benefits from longer bands and, in some cases, a third hinge. Do not economise on ironmongery. Thin or lightly built hinges can twist under load, no matter how well the timber gate has been made.
Position the top and bottom hinges in line with the gate's solid horizontal rails. On a mortice and tenon gate, this means fixing through the substantial frame rails rather than into decorative boarding alone. Put the top hinge roughly 150mm to 200mm down from the top of the gate and the bottom hinge the same distance up from the bottom. For a tall or heavy gate, place a third hinge around the middle rail.
Galvanised or powder-coated ironmongery is a sensible choice for exposed locations. Black traditional fittings remain popular and look right on many properties, but they still need a sound protective finish and occasional inspection, especially near the coast.
Set the gaps before you fit anything
The most common installation mistake is hanging the gate too tightly in the opening. Timber changes slightly with the seasons, and a gate needs room to move. A sensible starting point is around 8mm to 10mm at the hinge side and latch side, although the exact allowance depends on the gate design, the straightness of the posts and the hinges being used.
Leave enough clearance beneath the gate for the ground surface. On a level paved path, 50mm is often suitable. Where the ground rises, slopes or is finished with gravel, you may need more. Open the gate through its full swing before committing to the height. A gate that clears the path when shut may catch a slope as it opens.
Set the gate on firm timber packers at the desired height. Use a spirit level across the top rail and check the hanging edge is upright. Do not rely solely on the surrounding fence or wall for reference, as these may not be level. The gate needs to be true in its own opening.
If the gate has diagonal bracing, the brace should run upwards from the bottom hinge corner towards the top latch corner. This arrangement transfers weight back towards the hinge side. If it runs the other way, it does not provide the same support and the gate is more likely to sag over time.
How to hang a garden gate step by step
With the gate supported on packers, hold a hinge band against the gate rail and mark the fixing holes. Drill pilot holes before fitting the coach screws or bolts. Piloting is particularly important with quality timber, as it reduces the risk of splitting and helps the fixing pull up neatly.
Fix the hinge bands to the gate first, checking they are level with one another and sit flat against the timber. Then offer the gate back into the opening on its packers. Mark the position of each hook on the hinge post. The hooks must be vertically aligned, otherwise the gate will bind as it swings.
Fit the lower hook first, then the upper hook. Where adjustable hook-and-band hinges are used, leave enough thread or adjustment available to fine-tune the gate later. Lift the gate onto the hooks and test its movement before fitting the latch. A second person is useful here, especially with a framed, closeboarded or made-to-measure gate.
Open and close the gate several times. Look at the gap at the latch side, not only when the gate is shut but also through the first part of its swing. If it catches, first check that the posts are plumb and the hooks are aligned. Avoid forcing the gate or shaving timber away as a quick fix when a hinge adjustment will solve the real problem.
Fit the latch once the gate is running freely
Only fit the latch after the gate has settled correctly on its hinges. Mark the latch position at a comfortable height, usually around 1,000mm from the ground, and make sure it meets the keep or staple squarely. The latch should pull the gate closed without lifting it or pushing it sideways.
A ring latch is a traditional and practical choice for a garden gate, while a Suffolk latch gives a more decorative cottage-style finish. For a side passage or family garden, consider whether you need access from both sides, a lockable latch or a bolt for added security. The right choice depends on how the gate will be used, not simply how it looks.
Fit a stop batten to the latch post if needed. This gives the gate a positive closing point and prevents it from swinging too far through the opening. It also makes the latch easier to align and can reduce rattling in windy weather.
Protect the timber and inspect the installation
Apply a suitable exterior primer, paint, oil or preservative system to all faces and edges of the gate, including cut ends and drilled holes. If the gate was supplied factory-primed, follow the finishing guidance promptly rather than leaving it exposed for months. Timber performs best when moisture is kept out consistently, not when it is treated only after the first signs of weathering.
Engineered timber gates built with proper mortice and tenon joints, exterior-grade D4 adhesive and hardwood dowels offer greater stability than basic pressure-treated softwood construction. They still need a little care. Check the hinge fixings, latch alignment and protective coating each year, particularly after winter.
A garden gate should feel simple in use: it opens without a shove, closes without a lift and sits evenly between its posts. Get the foundations and hinge setting right, and the handmade timber will have every chance to do the job it was built for.


Comments