

How to Install a Wooden Gate Latch Properly
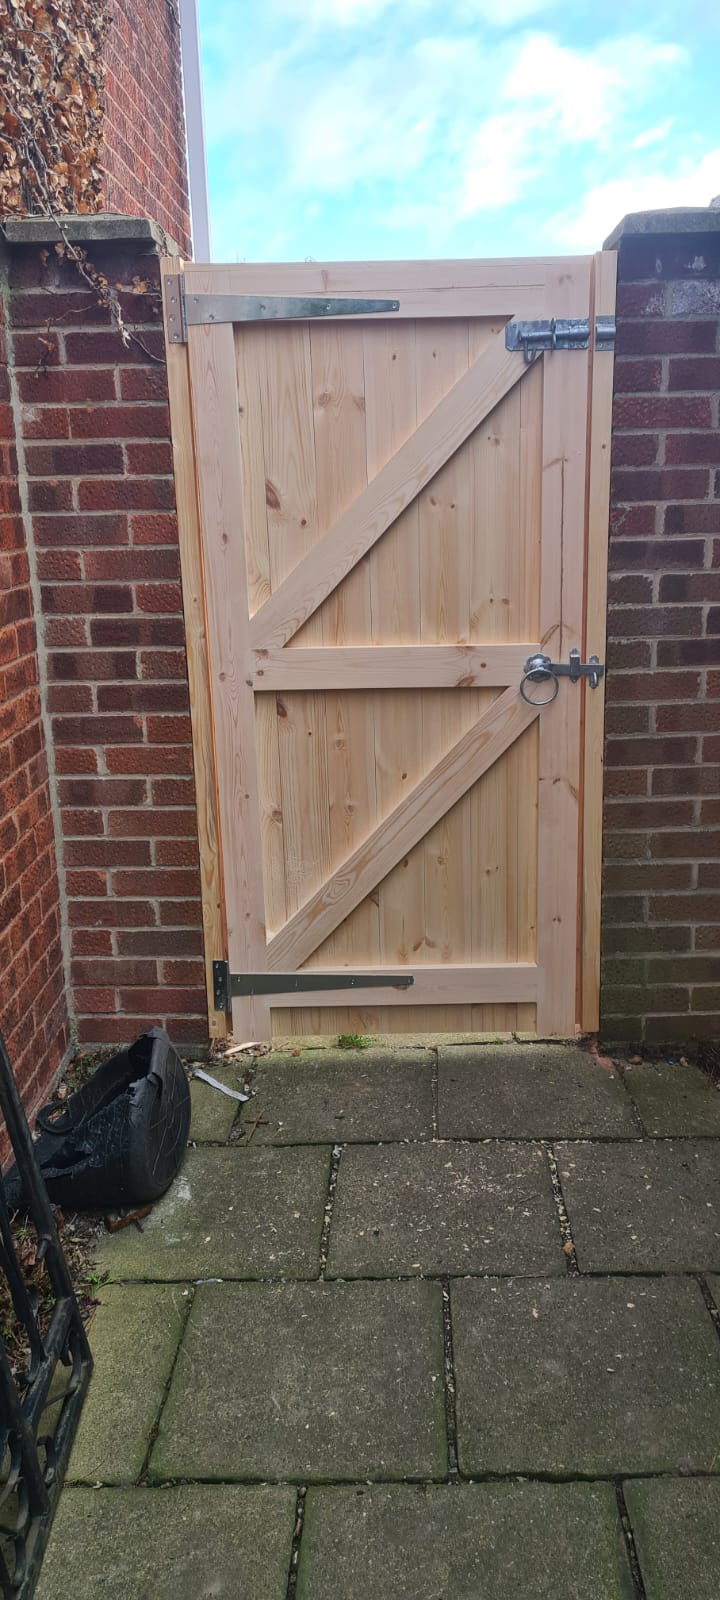
A latch is a small fitting with a big job. When you install a wooden gate latch correctly, the gate should close with a firm click, stay shut in the wind and open easily from the side you use most. Fit it carelessly, however, and even a well-made timber gate can sag against the catch, rattle in its frame or need lifting every time it is closed.
For garden gates, side gates and pedestrian access through a pair of driveway gates, taking time over the latch position is worthwhile. The fitting itself is straightforward. The real skill lies in setting the gate, posts and latch strike so they meet cleanly under everyday use.
Check the gate before fitting the latch
Do not use the latch to pull a poorly hung gate into line. Before marking any holes, make sure the gate is hanging at its final height, with hinges properly tightened and sensible clearance around all sides. A timber gate needs a little room to move through wet and dry seasons, but it should not have a gap so large that the latch barely reaches its catch.
As a guide, allow an even closing gap between the hanging edge of the gate and the post. The exact measurement depends on the style of latch and the straightness of the post, but around 10-15mm is often workable for a standard Suffolk latch or ring latch. Check the manufacturer’s fitting allowance rather than relying on one figure alone.
Open and close the gate several times. Watch whether its leading edge drops as it swings shut. If it does, adjust the hinges or packing before fitting ironmongery. A latch fitted to a gate that is already dropping will soon become difficult to use. This is particularly relevant on wider gates, where weight and leverage place more demand on hinges and posts.
A solid gate post matters just as much. If the post rocks in the ground, twists or has a badly worn face, no amount of adjustment to the latch will provide a lasting fix. Resolve movement first, then fit the latch to stable timber.
Choose a latch suited to the gate and access
The familiar Suffolk latch remains a practical choice for most timber garden gates. It has a thumb lever on the outside, a lifting latch bar on the inside and a simple catch fixed to the closing post. It suits traditional gates particularly well and can be supplied in black, galvanised or more decorative finishes.
A ring latch gives operation from both sides, which can be useful where the gate is used regularly from the garden and the path. For a side entrance where security is a concern, a lockable long-throw gate latch may be the better option. It allows the gate to be operated from outside and can be locked with a padlock. The trade-off is that it needs a sound, adequately thick gate stile and precise fitting so the bolt lands squarely in the receiver.
Consider how the gate will be used before buying the ironmongery. A thumb latch works well for a pedestrian garden gate, but it is not a security lock. A self-closing gate for children or pets may need a purpose-made spring-loaded latch, often used alongside self-closing hinges. On a double driveway gate, a latch is normally fitted to the meeting stiles only after one leaf has been secured with a drop bolt or gate stop.
Tools and fixings for a tidy installation
Most wooden gate latches can be fitted with a tape measure, pencil, drill-driver, drill bits, screwdriver, spirit level and suitable spanners. A bradawl is helpful for starting screw positions accurately, especially on painted or finished timber.
Use the fixings supplied with good-quality ironmongery where they are appropriate for the timber and location. For exterior gates, galvanised or stainless-steel screws are preferable because ordinary screws can stain timber and corrode quickly. Pre-drill pilot holes in hardwood, engineered timber and near the edge of a stile. This prevents splitting, makes driving screws easier and gives a neater result.
If your gate has been primed, painted or oiled, seal any fresh drilled holes and exposed end grain before the latch is finally fixed. It is a small step, but it helps keep moisture out of vulnerable areas around the fixings.
Set the height around the user, not just the gate
There is no single compulsory latch height. For a standard pedestrian gate, somewhere around 1,000-1,100mm from ground level is usually comfortable for an adult to operate. Check where the latch will sit in relation to the gate rails, braces and joints. It needs to be fixed into substantial timber, usually the closing stile, not a thin infill board.
Avoid placing a latch directly over a mortice and tenon joint where possible. A handmade gate built with proper joinery has strong stiles and rails, but screws should still be positioned thoughtfully. Choose a clear section of timber that lets the latch bar sit flat and travel freely.
How to install a wooden gate latch step by step
Start by holding the latch bar against the inside face of the closed gate. Position it at your chosen height, ensuring the bar runs level towards the closing post. Mark the fixing holes and the point where the spindle or thumb latch will pass through the gate.
Drill the spindle hole carefully from one side, then complete it from the other if necessary to avoid breakout on the finished face. Use the diameter specified for the latch spindle. A hole that is too tight can make the mechanism bind, while an oversized hole can leave the thumb piece loose and untidy.
Fit the outside thumb latch or handle first, passing its spindle through the gate. On the inside, place the latch bar onto the spindle and check that pressing the thumb lever lifts the bar cleanly. Do not fully tighten all screws yet. Leave just enough movement for final adjustment.
With the gate closed, hold the catch on the post beneath the latch bar. The bar should drop into the catch naturally when released. It should not need forcing down, nor should it sit so shallowly that a gust of wind can shake it free. Mark the catch fixing holes, open the gate and drill pilot holes in the post.
Screw the catch in place loosely, then test the action again. You may need to move it by a few millimetres to achieve a positive closing action. Once the bar falls securely into the catch and lifts without rubbing, tighten every fixing firmly. Apply a little suitable lubricant to moving metal parts if recommended by the ironmongery supplier.
If the latch catch has an adjustable plate or keeper, use that adjustment to refine the final fit. Do not enlarge holes or bend components aggressively to compensate for a gate that is out of square. It is better to correct the hanging or add appropriate packing behind a catch than to put the fitting under constant strain.
Common fitting problems and what causes them
A latch that will not drop into its catch is usually a matter of height or alignment. First check the gate has not settled on its hinges. If the gate is level, raise or lower the catch slightly. On a gate that closes against a sloping drive or path, check clearance at the bottom as well. Raising the whole gate may be necessary before adjusting the latch.
If the thumb latch feels stiff, the spindle hole may be too tight, the internal bar may be overtightened against the gate, or the latch parts may not be square to one another. Loosen the fixings, realign the components and test again before tightening.
A gate that bounces open after closing may need the catch moved further across the post so the latch bar sits more deeply. Conversely, if it is difficult to lift the latch to open the gate, the catch may be too far across or too high. Small adjustments make a noticeable difference.
Rattling is common when a gate has a generous closing gap or a lightweight latch has been fitted to a heavy gate. A deeper catch, gate stop or a latch designed for the weight and thickness of the gate can improve the feel. For exposed locations, consider whether a spring-loaded latch or additional fastening is needed to resist wind.
Protect the timber and inspect the fitting
Ironmongery should be fitted after the gate has received its initial protective treatment, unless the coating system specifies otherwise. Keep paint, stain or oil out of moving latch parts, and wipe away any residue from the metal as you work. On painted gates, touching in around screw heads helps maintain a clean, weatherproof finish.
Inspect the latch at least twice a year, ideally when you check hinges and gate posts. Tighten any loosening screws, clear grit from the catch and look for signs that the gate is beginning to drop. Timber naturally responds to the weather, so a minor seasonal adjustment is not a sign of poor workmanship. It is normal maintenance that keeps a properly made gate working as it should.
A well-fitted latch should feel like part of the gate rather than an afterthought. Set it carefully, use exterior-grade fixings and deal with any hinge or post movement early, and each closing click will give you the reassurance that the gate is doing its job.


Comments