

How to Prevent Wooden Gate Warping for Good
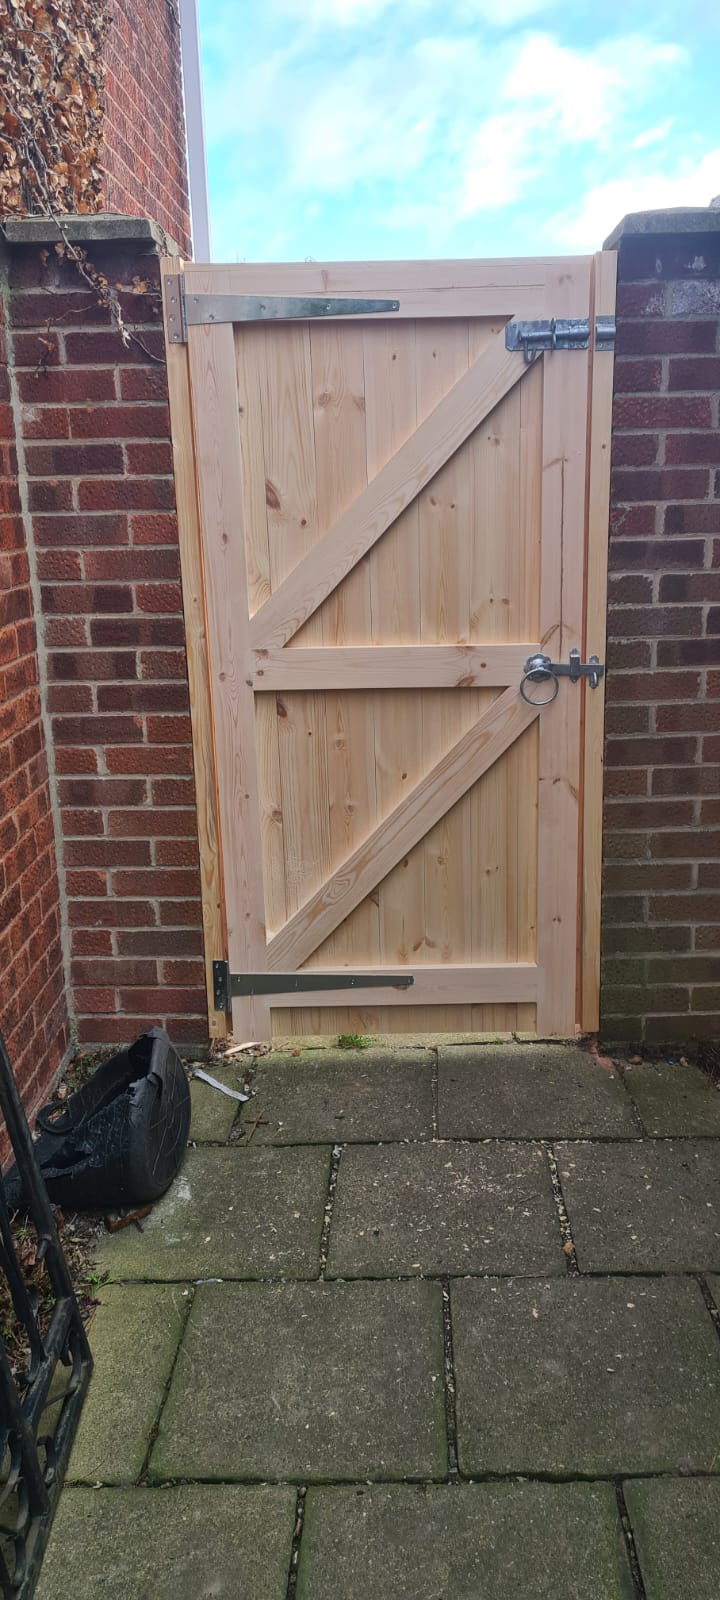
A wooden gate that begins to twist, cup or drop is rarely suffering from one bad day of weather. The usual cause is uneven moisture movement over time. To prevent wooden gate warping, the timber, joinery, finish and fitting all need to work together from the start - particularly in the UK, where wet winters, dry spells and exposed coastal or hillside locations can test any exterior joinery.
A well-made timber gate should be built to move naturally without losing its shape. Wood is not a static material, and anyone promising otherwise is not being straight with you. The aim is to control moisture intake, allow sensible movement and use construction that keeps the gate properly supported for years to come.
Why wooden gates warp
Timber absorbs and releases moisture according to the air around it. When one face of a gate becomes wetter than the other, it expands at a different rate. This can cause boards to cup, rails to bow and the whole gate to pull out of square.
Rain driven against the front of a gate, a shaded side that stays damp, or a sunny face that dries too quickly can all create that imbalance. End grain is especially vulnerable because it takes in water far more readily than the face of the timber. Water sitting along the bottom rail or around a poorly protected joint soon creates problems too.
Warping is often blamed entirely on the wood species, but the construction and installation are just as important. A gate can be made from good timber and still move badly if it has weak joints, insufficient bracing, an unsuitable finish or hinges that do not carry its weight correctly.
Start with stable, properly prepared timber
The biggest decision is made before the first joint is cut. Timber needs to be suitable for exterior work, correctly dried and selected with stability in mind. Fast-grown, poorly prepared softwood is more likely to move than carefully chosen material that has been machined and assembled in a controlled workshop environment.
For many homeowners, engineered timber offers a practical middle ground between standard pressure-treated timber and costly hardwood. It is made by bonding selected sections together so the natural stresses within the wood are balanced. This helps produce straighter, more stable components, while retaining the character and warmth that make timber gates so appealing.
Pressure treatment still has a role. It provides valuable protection against decay and insect attack, but it does not guarantee that a gate will stay straight. Treatment is not a substitute for sound construction, sealing and maintenance. In fact, newly treated timber may need time to dry before some finishes can be applied successfully.
At Premier Timber Gates, engineered timber is used because it gives a dependable balance of strength, stability and value for made-to-order gates. It is a sensible choice for homeowners who want a substantial handmade gate without moving into the cost of a full hardwood build.
Prevent wooden gate warping with proper joinery
A gate is only as strong as its joints. Screwed butt joints may be quick to assemble, but they do not provide the same long-term resistance to racking and movement as traditional mortice and tenon joinery. When a heavy gate opens and closes every day, the forces are concentrated at its corners and rails.
A properly formed mortice and tenon joint creates a mechanical connection between the frame members. Combined with D4 exterior-grade adhesive and hardwood dowels, it gives the gate a far better chance of holding its shape through changing seasons. The adhesive must be suitable for outdoor exposure, but it should support the joint rather than compensate for poor fitting.
Bracing matters too. On a ledge and brace gate, the diagonal brace should run from the bottom hinge side up towards the top closing side. This transfers the gate’s weight back towards the hinge side, helping to prevent it from sagging. If the brace runs the other way, it may look similar but it cannot do the job intended.
For framed driveway gates, rails, stiles and infill boards must be proportioned for the gate’s width and weight. Very wide gates need enough structure to resist flexing, while still allowing individual boards to move naturally. This is one reason bespoke manufacture is valuable: a gate should be built for its actual opening, not forced to suit a standard size.
Seal every surface, not just the front
Finishing a gate is about more than appearance. A quality exterior primer, paint system or suitable timber oil slows moisture movement, reducing the difference between the two faces of the gate. The key word is all. Applying finish only to the visible front is a common cause of uneven movement.
Before fitting, coat the front, back, top and bottom edges, as well as around joints, cut-outs and drilled holes. Take particular care with end grain at the bottom of the stiles and rails. These areas are close to splashback from paving and soil, and they are easy to miss once the gate is hung.
Paint systems generally offer stronger surface protection and are often the best choice where a solid colour suits the property. Oils allow the timber grain to remain visible and are simpler to refresh in small areas, but they usually need more regular attention. Neither option is completely maintenance-free. The right choice depends on the look you want, the gate’s exposure and how willing you are to carry out periodic care.
Do not trap moisture beneath a new coating. The gate needs to be clean and dry, and any previous failing finish must be properly prepared. Applying a thick coat to damp timber may look acceptable at first, then peel or crack when the weather changes.
Fit the gate so water can escape
Even the best gate can struggle if it is fitted badly. Leave sensible clearance around the gate so it can open freely through wet weather and seasonal movement. The exact gap depends on the size and style of the gate, but it should never be fitted tightly into an opening with no allowance for swelling.
Keep the bottom of the gate clear of the ground. Timber that constantly catches puddle splash, wet leaves or soil will stay damp for longer than it should. A threshold should drain away rather than direct water towards the bottom rail.
Use hinges rated for the size and weight of the gate, fixed into sound posts or masonry. Undersized hinges can allow a gate to drop, placing extra strain on the frame and joints. For larger driveway gates, adjustable fittings are useful because they allow minor alignment changes without drilling new holes or packing out worn hardware.
Posts deserve the same attention as the gate itself. They need to be substantial enough for the load, set securely and checked for movement. A leaning post can make a perfectly straight gate appear warped, and repeated force from a misaligned latch can gradually pull the gate out of square.
Give the gate a simple seasonal check
A few minutes of maintenance twice a year is usually more effective than waiting for a visible problem. Check after winter and again before the wettest part of autumn. Look closely at the lower edges, the tops of rails, joints and any areas hidden by hinges or latches.
A useful routine includes:
brushing away leaves, moss and soil that hold moisture against the timber;
checking that drainage below the gate remains clear;
tightening hinge fixings and confirming the latch closes without forcing the gate;
touching up damaged paint or refreshing oil before bare timber is exposed; and
looking for small cracks at end grain or joints, then sealing them promptly.
Small surface checks are not always serious, as timber naturally responds to the weather. What matters is whether they allow repeated water entry or are accompanied by loose joints, persistent movement or soft wood. Deal with those signs early, before a minor repair becomes a replacement job.
Avoid the common shortcuts
Do not assume a heavier gate is automatically a more stable one. Extra weight without stronger posts, hinges and joinery simply increases the load on the installation. Likewise, adding a bolt or latch to pull a distorted gate shut may hide the symptom while putting more pressure on the frame.
Avoid fixing boards so tightly that they cannot expand and contract. Exterior timber needs room to move. Where boards form part of a gate design, appropriate spacing and fixing positions help prevent one board forcing the next out of line.
Finally, do not leave bare cut ends after trimming a gate to suit an opening. Any fresh cut exposes absorbent end grain and should be sealed before the gate is put back into service. This small job is one of the easiest ways to protect a gate that has been adjusted on site.
A wooden gate should gain character as it weathers, not lose its shape. Choose stable materials, insist on honest joinery, protect every face and keep the installation dry and well supported. That is the practical route to a gate that continues to close cleanly and look right at the front of your home.


Comments